Start with wound-care basics: non-stick sterile pads, roll gauze, vet wrap, hemostatic gauze, and a triangular bandage. Add antiseptic, saline, tweezers, blunt-tip scissors, a thermometer, and vet-dosed diphenhydramine. Toss in trauma shears, a muzzle, and a slip lead for safe handling. Match kit size to trip length, vet distance, and your dog’s needs. Pack it in a waterproof, durable container with color-coded pouches. Below, you’ll find exactly how to dial each piece in.
TLDR Key Takeaways
- Pack core wound-care essentials: non-stick pads, roll gauze, vet wrap, hemostatic gauze, and a triangular bandage for slings or splints.
- Include cleaning and medicine basics like antiseptic, saline rinse, tweezers, vet-dosed diphenhydramine, a thermometer, and blunt-tip scissors.
- Add backcountry handling gear: trauma shears, a muzzle, slip lead, extra booties, and a cold pack for safe restraint and care.
- Size the kit to trip length, vet distance, cell coverage, and your dog’s size, activity level, and chronic conditions.
- Choose waterproof, durable containers and organize supplies into color-coded, boldly labeled quick-grab pouches for fast emergency access.
What Goes Into a Canine First-Aid Kit
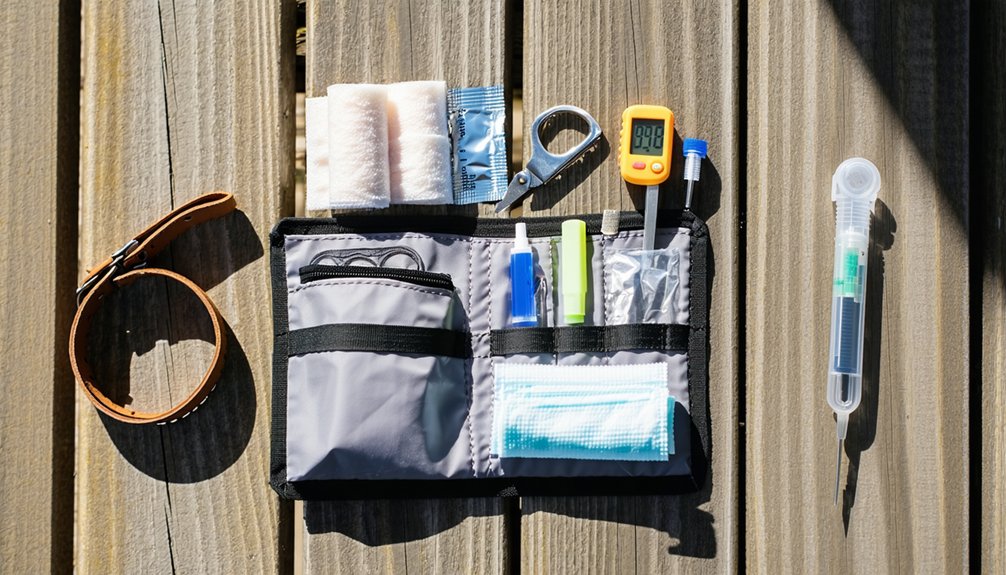
A backcountry canine first-aid kit’s value lies in its ability to handle the injuries dogs actually sustain on the trail: torn pads, cuts, insect stings, sprains, and heat-related emergencies.
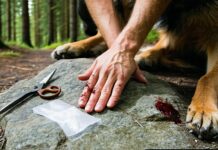
You’ll want non-stick sterile pads, roll gauze, self-adhering vet wrap, and adhesive tape to dress and secure wounds without sticking to fur.
Pack hemostatic gauze for serious bleeding and a triangular bandage for slings or splints.
Wound cleaning basics include topical antiseptic like Betadine or chlorhexidine plus saline rinse.
For dog allergy prep, carry vet-dosed diphenhydramine to manage stings and reactions.
Add fine-point tweezers, trauma shears, a muzzle, slip lead, extra booties, and a cold pack.
Don’t forget nitrile gloves, a thermometer, emergency contacts, and a notepad to record essential for your vet.
Match Kit Size to Trip Length and Dog
Knowing what belongs in your kit is only half the equation; how much of it you carry depends on where you’re going and who’s coming with you.
Start your trip duration planning with three questions: expected duration, veterinary distance, and cell coverage.
For day trips, keep it minimal and fast-access—a small grab-and-go pouch is enough to stabilize your dog until you reach help.
Overnight trips justify buffer capacity in a roomier duffel, plus 3–5 extra days of any prescription meds for delays.
Remote routes demand more, since unpredictable evacuation times stretch your stabilization window; pack emergency vet contacts too.
Finally, match capacity to your dog.
Larger, active dogs need added handling gear, while chronic conditions or special needs scale your kit upward.
Pick a Lightweight, Waterproof Container
Once you’ve decided how much to carry, you need a container that’ll keep it dry and intact on the trail. Prioritize waterproof, durable materials over untreated fabric or mesh. Choose one of these proven options:
- Hard-shell plastic boxes for shockproof storage that protects syringes, vials, and pill blisters from crushing.
- TPU-coated nylon or roll-top dry bags for lightweight, splash-resistant carrying that shaves ounces.
- Welded, gasketed cases with corrosion-resistant zippers for spillproof organization through repeated openings.
Look for IPX-rated or submersible labels, since they outperform vague “water-resistant” claims in rain, snow, or river crossings. Pick compact, low-profile shapes that pack efficiently and won’t snag on brush. For leak-prone liquids like hydrogen peroxide, double-bag inside the main container for added reliability.
Organize Supplies Into Quick-Grab Pouches

With your waterproof container chosen, you need a system inside it that lets you find the right supplies fast—because fumbling through a jumbled bag wastes time when your dog’s bleeding or struggling to breathe.
Smart pouch organization starts with color based access: assign red to life-threatening emergencies, blue to meds, green to support gear.
Use high-contrast colors for the most time-critical pouch, and add colored zipper pulls or tape to keep weight low.
Maintain labeling consistency with large, bold, water-resistant labels like “MEDS” or “TOOLS” on both pouch and interior items, so quick scanning works for any trip member under stress.
Group supplies by scenario—environment, medications, tools, restraint, records—and slip a mini contents card inside each pouch to reinforce memory when pressure hits.
Wound and Bleeding Control Essentials
When your dog tears a paw pad on sharp talus or rips open a flank on barbed brush, you’ve got minutes to control bleeding before blood loss becomes dangerous.
Layer sterile gauze pads for direct pressure, then secure them with conforming gauze and self-adherent elastic wrap that won’t stick to fur or restrict circulation.
Athletic tape reinforces ends and lets you include improvised pressure bandages when your dog moves.
To clean and manage blistering abrasions, fellow handlers rely on:
- Sterile saline for low-pressure irrigation that flushes dirt and bacteria
- Non-adherent pads that won’t disrupt the clotting wound bed
- Pet-safe hydrogel to maintain a moist, protected healing environment
Pack blunt-tip scissors to trim fur, improving access and bandage adhesion every time.
How Do You Stop Severe Bleeding on the Trail?
Nothing tests your composure like watching blood pour from your dog’s wound miles from the nearest trailhead. First, recognize severe bleeding: spurting flow, pooling blood, or dressings soaking through in seconds.
To stop bleeding, apply firm, continuous direct pressure with sterile gauze or a clean bandana for 10–30 minutes—don’t peek early. If a pad saturates, layer more on top for clot safe bandaging, preserving the forming clot.
Pack deep wounds firmly before reapplying surface pressure.
For deep cavities and arterial spurting, understand tourniquet timing: reserve it for limb hemorrhage that pressure can’t control. Once controlled, secure a bulky pressure bandage, checking distal circulation.
Throughout, prioritize shock monitoring—watch gum color, breathing, and responsiveness every 5–10 minutes, keeping your companion warm and still.
Protect Your Dog’s Paws, Eyes, and Body
The best wound care is the injury you prevent. Smart trail dogs and their handlers share one habit: they stop problems before they start.
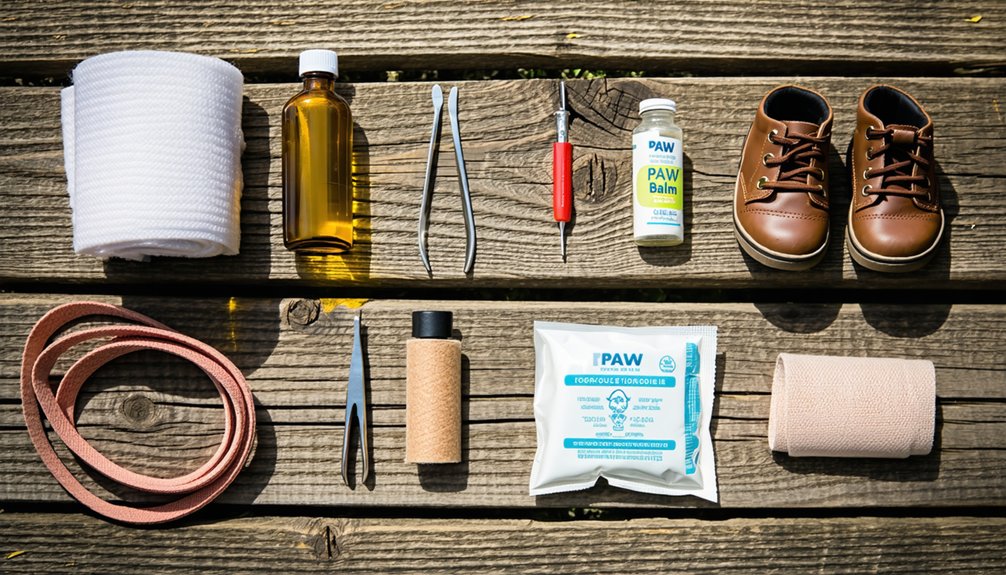
Nail and paw-hair maintenance, paw boot sizing tested at home, and musher’s wax applied thin before snow, ice, or salt all reduce pad trauma.
Run trail surface checks using the 7-second rule—if you can’t hold your hand on hot rock or asphalt, neither can your dog.
Inspect paws every break for cuts, ice balls, or foreign bodies.
Protect eyes and body too:
- Doggles for snow, desert, and water-reflection glare
- Sterile saline eye wash to flush dust, seeds, or ash
- Packable insulating jacket for short-haired, small, or low-body-fat breeds
Prevention keeps your pack moving.
Dog-Safe Medications and Correct Dosing
Medications can save your dog’s life in the backcountry—or end it if you guess at doses. Medication safety starts with knowing exact weights and respecting dosing limits.
For mild allergy triggers like hives or insect bites, diphenhydramine runs 1 mg/lb every 8–12 hours; skip any decongestant or alcohol-containing formula.
Cetirizine and loratadine work too, but use plain versions only.
For diarrhea, loperamide helps short term—but drug contraindications matter: never give it to herding breeds with the MDR1 mutation or dogs with infectious diarrhea.
Avoid ibuprofen, naproxen, and other human NSAIDs entirely; they cause GI bleeding and kidney injury.
Acetaminophen and aspirin demand veterinary oversight.
Build your kit alongside your vet, and you’ll carry confidence—not guesswork—into the wild.
Tools for Ticks, Spines, and Checking Fever
Although medications often steal the spotlight, the right tools handle the threats you’ll actually face most in the backcountry: ticks burrowing at the skin, cactus spines lodged in paws, and fevers that signal trouble brewing inside.
Pack fine-tipped tick tweezers, then grasp close to the head and pull straight out—never burn, twist, or smear petroleum jelly, which increases pathogen transfer.
Save the tick in a sealed bag for testing, a smart move for tick prevention and symptom monitoring.
For spines, carry:
- Pointed stainless tweezers and duct-tape loops for glochids
- Sterile saline to flush debris from pads and eyes
- Vet wrap to protect paws on the hike out
Finally, bring a digital rectal thermometer; normal runs 38.3–39.2°C (101–102.5°F).
Restraint and Safe Handling of an Injured Dog
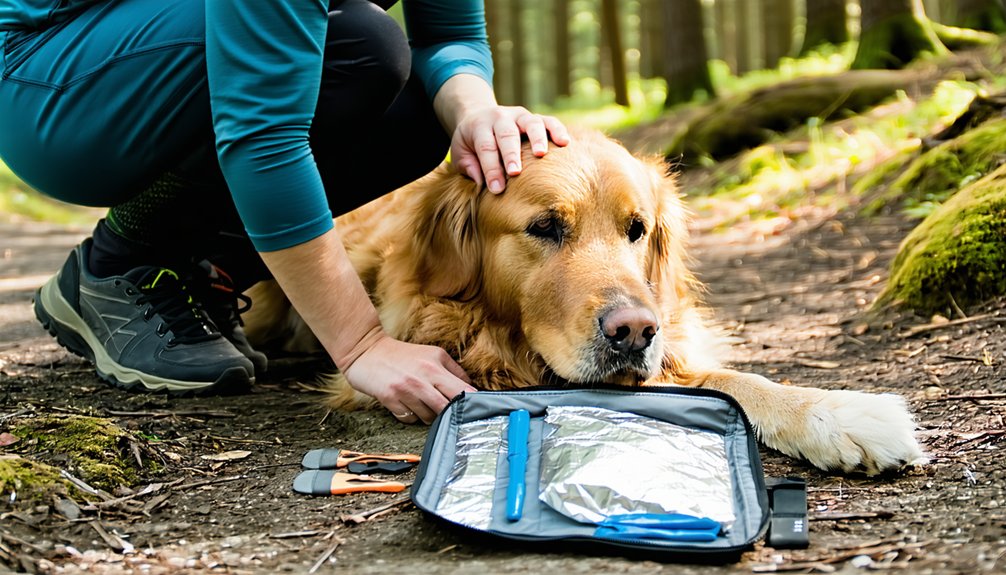
In the backcountry, even your most devoted dog can bite when pain and fear take over, so plan every approach as if those teeth are in play.
Scan the scene for hazards first, then approach at an angle, shoulders turned, voice low and steady.
Skip direct eye contact—it reads as a challenge.
Practice noncontact de escalation through slow movements and calm tones, backing off the moment fear sign observation reveals stiffening, growling, lifted lips, tucked tail, or whites of the eyes.
Pack a commercial or improvised muzzle, but never muzzle a dog that’s vomiting, overheating, or struggling to breathe.
Wrap small dogs burrito-style in a towel, nose exposed.
Restrain over broad, non-painful areas—chest, shoulders, pelvis—and support both ends, keeping the spine straight when lifting.
How Do You Evacuate a Dog That Can’t Walk?
When your dog can’t walk, your first job isn’t to move—it’s to stabilize. Clear immediate threats, control bleeding, keep your dog warm and dry, and prevent spinal motion by avoiding unnecessary repositioning or flexing the neck and back.
Contact a vet or rescue service early to signal emergency triage and guide your decision.
Match your evacuation method to terrain, distance, and your dog’s size:
- Small dogs: Use a two-arm cradle or backpack carry, keeping the head raised and airway clear.
- Medium to large dogs: Try a blanket drag or two-person stretcher to minimize tilting.
- Suspected spinal injury: Build a rigid stretcher from trekking poles and a tarp, then secure your dog centered.
Coordinate every step, and rest often.
Keep Your Kit Lean After Every Trip
A lean kit starts the moment you get home, not the night before your next trip.
Lay out every canine-specific item and cross-check it against your packing list.
Strong kit inventory habits reveal what you never touched—duplicate tools, extra wraps—and what you burned through, like gauze, vet wrap, and antiseptic wipes.
Flag unused items for removal and restock heavy-use supplies in smaller, trip-appropriate amounts.
Track recurring issues, such as paw abrasions or minor GI upset, so your contents match real problems, not rare ones.
Inspect medications and saline for expiration dates, then repackage bulky human-sized supplies into labeled mini-containers.
Adopt weight tracking methods: weigh the full kit periodically with a luggage or kitchen scale, comparing against your target to catch weight creep early.
Frequently Asked Questions
How Often Should I Replace Expired Medications in My Dog’s First-Aid Kit?
Replace expired medications immediately—don’t wait. Schedule expiration checks at least twice yearly, aligning with daylight saving changes. In backcountry conditions, inspect every 3–6 months. Practice storage rotation, using older stock first, and discard anything degraded right away.
Should I Take a Canine First-Aid Certification Course Before Backcountry Trips?
Yes, you should. Join others who prioritize pre trip training options, building real skills through basic rescue scenarios. Pair certification with a gear readiness checklist and communication plans, so you’re prepared when evacuation isn’t immediately possible.
Can I Use Human Medications on My Dog in Emergencies?
Don’t use human medications on your dog without veterinary guidance. Like fellow responsible owners, you’ll prioritize medication safety—many human drugs are toxic. Leave dosage calculations to your vet, who’ll direct any emergency exception following the prescribing cascade.
What Signs Indicate My Dog Needs Immediate Veterinary Evacuation Versus Trail Treatment?
Evacuate immediately if you see labored breathing, collapse, seizures, or shock severity signs like pale gums. When hemorrhage control fails after five minutes, get help fast. We trail dogs stay safe by knowing these red flags.
How Do I Keep My Dog Calm During a Stressful Injury?
Speak softly and use slow breathing to calm your dog. Offer familiar scent from your gear, apply gentle restraint to limit thrashing, and provide distraction treats. You’ve got this—your steady presence reassures them you’re both safe together.
Conclusion
You’ve now got the structure to build a kit that’s light enough to carry and complete enough to matter. Match your supplies to your dog and your route, keep everything waterproof and organized, and practice your restraint and evacuation skills before you need them. After each trip, restock what you used and cut what you didn’t. A lean, familiar kit you’ll actually carry beats a bloated one you leave behind. Train, pack, and go prepared.
References
- https://adventuremedicalkits.com/products/adventure-dog-medical-kit-trail-dog
- https://www.backcountry.com/adventure-medical-kits-adventure-dog-series-medical-kit
- https://www.amazon.com/Adventure-Medical-Kits-Trail-First/dp/B00T72ST1Y
- https://www.facebook.com/groups/82338447841/posts/10162018319947842/
- https://www.backcountry.com/adventure-medical-kits-adventure-dog-series-vet-in-a-box
- https://www.youtube.com/watch?v=Rv4H6by9n_Y
- https://www.wilderdog.com/products/trail-dog-medical-kit
- https://www.thedogwalksme.com/2022/06/09/what-you-need-in-a-hiking-dogs-first-aid-kit/
- https://www.youtube.com/watch?v=akdhKur_WAk
- https://www.treelinereview.com/gearreviews/best-dog-first-aid-kits