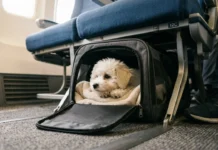
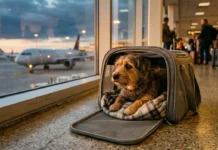
List complete shipper and consignee details, then affix a smooth, weatherproof shipping label to the crate’s top panel. Mark “Live Animal” in letters at least 1 inch high, and place labels on the top and two opposite sides at handler eye level. Add bold upward-pointing arrows, apply Cargo Aircraft Only labels if needed, and attach travel documents plus feeding and medication instructions. There’s more to get exactly right below.
TLDR Key Takeaways
- Affix the main label to a clean, dry top panel, keeping it smooth, bubble-free, and taped for protection.
- Place yellow “Live Animals” labels on the top and at least two opposite sides at handler eye level.
- Use durable, waterproof, UV-resistant labels with lettering at least 1 inch high and 4.5:1 color contrast.
- Ensure labels avoid ventilation openings, inspection windows, strap zones, and never block airflow or barcodes.
- Attach directional arrows pointing skyward and secure travel documents in a transparent pouch on top.
Start With Shipper and Consignee Contact Info
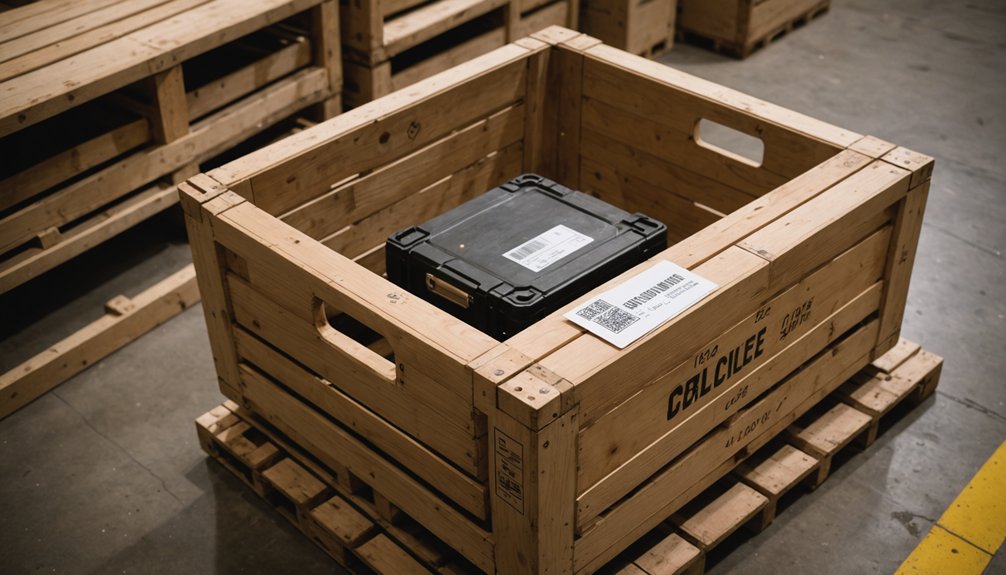
Before you seal a single crate, get the shipper and consignee details right—these fields anchor every document that follows. Write the full shipper name, street address, city, and country on the air waybill, then list at least one contact method—phone, telex, fax, or email—directly beneath it.
Do the same for the consignee in the dedicated box. Add the shipper account number where required, and never skip it on dangerous goods paperwork, which demands full names, addresses, and phone numbers for both parties. In addition to shipper and consignee contact information, be sure to affix a permanent ID with name, address, and phone number to the pet’s collar.
You control this process, so treat it as non-negotiable groundwork for regulatory compliance. Loose or inconsistent contact data invites delays, rejected cargo, or worse—compliance failures you can’t undo once the crate’s in transit. Beyond contact details, crates must also comply with IATA Live Animal Regulations to ensure the shipment itself meets airline standards. Also remember that live animals being shipped must be at least eight weeks old and fully weaned before they are permitted to travel.
Attach the Shipping Label to the Crate
Once you’ve locked in shipper and consignee details, you’re ready to put that information to work on the crate itself. Label placement matters: choose the largest flat surface, avoid seams and hardware, and affix your main label to the top panel. Crate preparation starts with cleaning the surface—no dust, oil, or moisture—so adhesive bonds properly. Smooth the label fully, eliminating bubbles or lifted edges, then protect it with clear tape or a document pouch. In addition to the shipping label, yellow “Live Animals” labels should be placed on each upper side and the upper back of the crate.
| Surface Type | Attachment Method |
|---|---|
| Wood/metal/plastic | Self-adhesive label direct to clean surface |
| Slatted/uneven | Mount on rigid plate, then fasten |
| Wire-mesh/vented | Zip-tie mounted tag or plate |
| High-volume shipments | Thermal label for durability |
Keep barcodes uncovered and routing data clear of strap zones.
Mark “Live Animal” in Letters at Least 1 Inch High

Bold, unmistakable lettering does the heavy lifting when it comes to identifying live cargo. USDA and IATA rules require “Live Animal” wording in letters at least 1 inch high on every label marking your crate. This isn’t cosmetic—it’s a pass/fail checkpoint for ramp agents and acceptance staff who need to spot live cargo fast, even in dim or crowded holds.
Stick to durable, waterproof labels—reflective finishes help in low-light conditions—and match IATA’s color codes: green for general live animals, red for laboratory animals. Pre-made label sets, such as a Roll – 500 Live Animal Stickers Labels w / Arrows, already include directional arrows and the required wording to meet these standards. Many airlines, including Iberia, Lufthansa, and Alaska, will also provide these required stickers at check-in if you don’t already have your own. Beyond labeling, carriers also rely on a NOTOC document to notify the captain of the species, location, and quantity of all live cargo on board.
Solid animal labeling only works if it doesn’t compromise crate ventilation.
Position your lettering and labels so they never cover vents, mesh, or airflow openings.
Choose a crate roomy enough to display required markings without blocking the airflow your animal needs.
Place “Live Animals” Labels on the Top and Sides
Letter size means nothing if handlers can’t spot the label from where they’re standing. Smart label placement puts “Live Animals” markings on top and at least two opposite sides of your crate.
This isn’t bureaucratic overkill—it’s what keeps your animal visible during stacking, racking, and loading into ULDs, where a single top label gets buried.
Stick labels on smooth, solid panels only.
Skip ventilation openings and inspection windows entirely.
Keep straps, netting, and shrink wrap clear of the label surface.
Position side labels at typical handler eye level for instant recognition during acceptance and loading. Quality labels are made with reflective material and strong adhesive to ensure visibility even in dim cargo holds. These labels are backed by a 2-year indoor and outdoor life, so they hold up through repeated handling and exposure without losing legibility. Proper labeling also ties directly into broader container requirements that specify marking standards for different species and crate types.
This redundancy isn’t excessive—it’s animal welfare in action.
Multiple labels mean multiple chances for correct handling, cutting the risk of misrouting or rough treatment your animal can’t afford.
Add Directional Arrows for Upright Positioning

Two bold arrows pointing skyward tell handlers everything they need to know about which way your crate stays oriented. If you’re shipping liquid dangerous goods by air transport, IATA DGR 7.2.4.4 requires these arrows on two opposite vertical sides—never on top or bottom. Inner packagings of 120 ml or less surrounded by absorbent material are exempt from this requirement.
Keep them black or red against a contrasting background, sized at least 74mm x 105mm, and scaled proportionately to your crate. Place labels in the upper third of each face, clear of straps, seams, and corners. A rectangular border framing the arrows is optional and does not affect compliance. This orientation symbol functions as a directional pictogram commonly used across packaging and logistics signage.
Pack your crate with closures and filling holes facing upward, matching your arrow direction exactly. Pair these arrows with fragile or handling warnings for added clarity. Correct orientation marking keeps cargo handling crews confident and prevents incompatible loading across ULDs, containers, and pallets.
Keep Label Placement Clear of Straps and Seams
Since straps, seams, and edges take the brunt of handling stress, you’ll want to keep your labels clear of them entirely. Smart label placement means choosing a panel that won’t intersect a strap path, since straps create pressure points that wrinkle labels and block barcodes from scanners.
Before securing your crate, map out where the banding will run and position your label well outside that zone. Strap clearance isn’t the only concern—seams demand the same respect. Labels must also remain clearly visible and not obscured by any markings or attachments on the crate surface.
Keep barcodes at least 1.25 inches from edges, and never let a label cross a seam, since flexing there tears material and distorts scans. Choose a central, flat panel instead of a perimeter spot. This is especially critical for automated sorting, since barcode scanners rely on unobstructed, unwrinkled surfaces to route crates efficiently.
Corners and borders take the most abuse during transport, so steer clear and protect your label’s readability from start to finish.
Choose Weather-Resistant Labels That Last 30 Days
Placement only protects a label that can actually survive the trip, so material choice matters just as much as position.
Choose vinyl, polyester, or polypropylene facestocks built for weather resistance—materials proven to handle months or years outdoors, far beyond your 30-day minimum.
Industrial vinyl and PET label stocks are rated for years of sun, heat, and moisture exposure, giving you a real durability margin instead of a bare pass.
Don’t stop at facestock.
Demand UV-resistant inks and pigments to keep barcodes and text scannable after weeks of ramp exposure.
Add lamination or protective topcoats to shield print from abrasion and fading.
Label durability isn’t optional on airfreight routes—it’s the difference between a crate that clears customs and one that gets flagged for illegible markings.
Use Contrasting Colors So Labels Stay Visible
Color contrast makes or breaks a label’s legibility long before anyone reads its text. You need pairings that hit at least 4.5:1, though black on white (21:1) or dark blue on bright yellow (12:1) gives you room to spare.
Skip red-green combos and light gray on white—they fade under dim light or dust and leave you exposed to compliance headaches.
Apply color theory deliberately: use complementary colors like orange and dark blue for text that pops against crate surfaces, and save analogous hues for backgrounds only. Stick to three or four colors total so nothing competes for attention.
Label placement matters just as much. Put critical text on a single contrasting panel, covering at least 40% of the surface, so handling instructions stay visible even through obstructions.
Apply Cargo Aircraft Only Labels When Required
Before you slap a CAO label on anything, check the dangerous goods list entry for your specific substance or article.
Review the passenger and cargo aircraft columns to see quantity limits and authorization status.
That entry drives your decision, not habit or convenience.
Apply the CAO label only when it’s actually required:
- The passenger-aircraft column reads “Forbidden,” but cargo shipment is still allowed under the packing instruction.
- Your quantity per package exceeds passenger-aircraft limits, forcing cargo-aircraft-only handling.
- A state or operator variation imposes cargo restrictions that override the base entry.
- You’re shipping Type B(M) radioactive packages, which require CAO marking on both the package and freight container.
Skip the label when passenger and cargo limits match—CAO isn’t decoration, it’s regulatory necessity for restricted dangerous goods.
Get the CAO Label Size and Color Right
Once you’ve confirmed the CAO label is actually required, you can’t just print any orange sticker and call it done—size and color specs are fixed by IATA DGR.
Label dimensions must measure at least 120 mm wide by 110 mm high, and the shape stays rectangular—no squares, no creative resizing. The only exception is halving dimensions for small Division 6.2 packages. Many commercial labels run slightly larger, like 125 × 110 mm, for better visibility while staying compliant.
Color standards are just as strict: background must be orange Pantone 151, with black text and symbol for contrast. Your design has to match Figure 7.4.B exactly—no substitutions, no tweaks. Fluorescent orange stock is fine, as long as the Pantone tone holds up under standard cargo lighting. Stay within these specs, and airlines won’t have grounds to reject your crate.
Attach Travel Documents to the Top of the Kennel
Paperwork matters just as much as labeling, and it needs a home on top of the kennel.
Attach a document pouch securely to the outside of the crate—APHIS wants it readily accessible so handlers can route your animal without delay.
A transparent pouch is your best bet; it lets staff inspect travel paperwork fast without digging through the kennel.
Your pouch should hold:
- Health and acclimation certificate, signed within 10 days of travel
- Owner information and routing details
- Feeding and watering instructions
- Rabies vaccination certificate, if required by your destination
Check every document for errors before attaching it.
If you’re crossing borders, attach copies and keep originals with you at check-in—this protects your paperwork if the pouch gets lost or damaged in transit.
Attach Food, Water, and Medication Instructions
Hunger and thirst don’t pause for layovers, so your kennel needs clear instructions on feeding, watering, and medication before it ever leaves your hands. Your food instructions should specify last feeding time, exact food type, portion size, and whether feeding’s required in transit—only pack enough for the trip. Water guidelines matter just as much: note container placement, use frozen water to prevent spills, and confirm pre-flight watering with a timestamp.
| Instruction Type | Key Details to Include |
|---|---|
| Food | Type, portion, last-fed time, transit feeding status |
| Water | Container method, freeze option, pre-flight timestamp |
| Medication | Name, dosage, administration time, vet contact |
List allergies and dietary restrictions clearly—airline staff won’t guess, and your animal shouldn’t suffer for it.
Frequently Asked Questions
Do All Airlines Accept the Same Crate Labeling Requirements, or Do They Vary?
They vary. You can’t assume one-size-fits-all: airline regulations often add stricter rules beyond core cargo standards. Always check your specific carrier’s policy—don’t rely solely on ICAO or IATA basics for crate labeling.
Can I Reuse a Crate From a Previous Shipment, or Does It Need New Labels?
You can reuse the crate, but you can’t reuse old labels. Strip prior shipping records, inspect for damage, and apply fresh labels reflecting current destination, consignee, and crate history—don’t rely on outdated documentation.
What Happens if My Crate Is Missing a Required Label at Check-In?
Staff won’t accept your crate—you’ll face a delayed shipment until you fix the labeling. Skip this step, and you risk lost cargo, missed flights, and needless costs. Label correctly upfront; protect your freedom to ship without interruption.
Are Digital or Printed Shipping Documents Accepted Instead of Physical Labels?
No—digital signatures and electronic records support your paperwork, but they don’t replace physical crate labels. You still need visible marks and hazard identifiers on the crate itself; documents alone won’t satisfy handling and screening requirements.
Who Is Responsible if a Label Falls off During Transport?
The carrier’s on the hook—they must replace lost labels per shipping protocols. But if your packaging caused it, you’re liable. Protect yourself: secure labels properly and carry cargo insurance for peace of mind.
Conclusion
You’ve got everything you need to prep your crate the right way. Label it clearly, mark it correctly, and attach every required document before it leaves your hands. Don’t skip the small details—airlines won’t accept crates that fall short of spec, and your animal’s safety depends on it. Follow these steps every time, and you’ll clear check-in without delays or complications.
References
- https://www.aacargo.com/learn/animals-kennel-guidelines.html
- https://www.alaskacargo.com/petconnect/kennel-requirements
- https://www.iata.org/en/programs/cargo/live-animals/pets/
- https://2009-2017.state.gov/documents/organization/247119.pdf
- https://arkjfk.com/blog/f/iata-pet-crate-requirements-and-airline-acceptance
- https://www.icao.int/sites/default/files/APAC/Meetings/2025/2025 COSCAPSEA EASA DGI/5-Presentations/05-Packaging-marking-and-labelling.pdf
- https://www.law.cornell.edu/cfr/text/49/172.407
- https://www.iata.org/en/publications/manuals/labels-markings-posters-signage/
- https://www.customsmobile.com/regulations/expand/title49_chapterI_part172_subpartE_section172.448
- https://www.icao.int/sites/default/files/sp-files/SAM/Documents/2008/SAFTDG/ICAO_TIsMarkLabelDoc.pdf