Measure each paw while your dog stands square, bearing full weight—not sitting. Record width and length for all four paws separately, since front paws run wider and rear paws stay narrower and longer. Match width to the size chart, rounding up when between sizes. Break in gradually with short indoor sessions, checking for redness or pressure lines. Choose friction-reducing materials and proper boot height. The details ahead show you exactly how to spot and fix a fit before rubbing starts.
TLDR Key Takeaways
- Measure paw width and length while standing on a firm surface for accurate, weight-bearing sizing.
- Size using width, choosing the smallest boot that fully covers toes and nails without curling.
- Break in gradually with single-boot indoor sessions, increasing duration before trying outdoor walks.
- Watch for redness, pressure lines, or gait changes as early warning signs of rubbing.
- Ensure snug straps, flat pads, and flexible ankles to prevent chafing and unnatural movement.
How to Measure Your Dog’s Paws Correctly

Getting the right fit starts with proper preparation. Set your dog on a firm, non-slip surface with full weight on the paw—this is non-negotiable for accurate sizing. Grab paper, a pen, and a ruler. Time it right: after a walk or play session, not right after grooming.
For paw measurement, mark the longest toenail’s tip and the heel’s back for length. For width, measure the widest part of the pad while it’s bearing weight. Keep your marker vertical to avoid skewed lines. Tracing the whole paw works too—just measure length and width afterward. Since boot sizes vary by manufacturer and type, always check the item description before ordering. Avoid measuring the paw directly with a ruler, since tracing on paper gives a far more accurate result.
Record both inches and centimeters. Don’t guess based on breed—paw sizes vary too much. Re-measure as your dog grows.
Why Front and Rear Paws Need Separate Measurements
Once you’ve measured each paw, don’t assume one number fits all four boots. Paw anatomy explains why: your dog’s front paws carry roughly 60% of body weight, making them wider and rounder, while rear paws stay narrower and longer.
This isn’t cosmetic—it’s canine biomechanics at work. Front limbs absorb shock and stabilize direction; rear limbs drive propulsion. Different jobs mean different contact angles and pressure patterns on the ground. Left unaddressed, poor-fitting boots can cause microdamage that builds over time and shows up as subtle behavior changes.
If you size all four boots identically, you risk oversized rear boots that slip and twist, or undersized front boots that pinch and restrict blood flow. Measure LF, RF, LR, and RR separately, including width and length. This is why boots are sold in sets of two, allowing you to choose different sizes for front and rear paws. If you’re unsure which size to choose, it’s best to order the larger size initially, since exchanges can be made afterward. You’ll give each paw the freedom to move naturally, without forcing one boot design to do two different jobs.
How to Read a Dog Bootie Size Chart
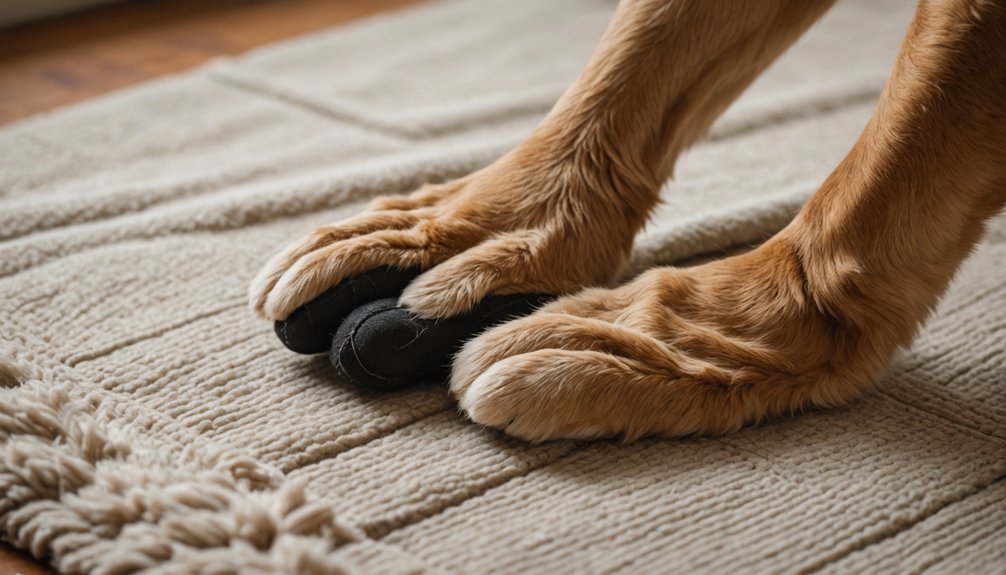
A size chart only works if you measure the way it expects you to. Most charts key off paw width, not length, so trace your dog’s paw while standing and bearing full weight—that’s when it spreads to its real size.
Chart formats vary: some list inches only, others pair metric and imperial numbers, and a few group sizes by width ranges instead of exact figures. Match your measurement to the correct row, then check for product-specific notes, since sizing can shift between boot styles even within the same brand. Always choose the smallest size that still covers your dog’s entire paw, including the toe nails.
If your number falls between two sizes, round up rather than down. Don’t rely on size conversions from other brands—labels like “M” or “L” aren’t standardized. Trust your own measurement over the name on the box. Remember that heart size cannot be measured, but paw size can, so precise measuring is what makes a bootie fit properly. Once fitted, make sure the zipper is fully zipped and the velcro is securely fastened around the ankles before letting your dog move around.
What a Properly Fitted Bootie Feels Like
Snugness tells you more than any size chart can. Bootie comfort starts at the paw: toes reach near the front without curling, pads rest flat, and the sole flexes with each step. You should slide a fingertip under the strap—firm, not tight, with nothing pressing on the dewclaw. Your dog’s limb stays stable, never puffy or cool to the touch.
Good canine accessories let your dog move freely. Boots should offer flexibility at the wrists and ankles so your dog can move naturally without restriction.
Expect a brief adjustment period—some awkward stepping is normal—but gait should smooth out fast. Checking the fit periodically, roughly every 30 to 60 minutes during longer outings, helps you catch any rubbing before it becomes a problem.
Watch for repeated paw shaking, licking, or attempts to pull boots off; these signal a poor fit. A secure fit should sit around the ankle, not the toes, allowing comfortable, natural walking.
When sizing’s right, your dog walks, trots, and turns with confidence, feet planted and secure.
Fitting Checks That Confirm a Proper Bootie Fit
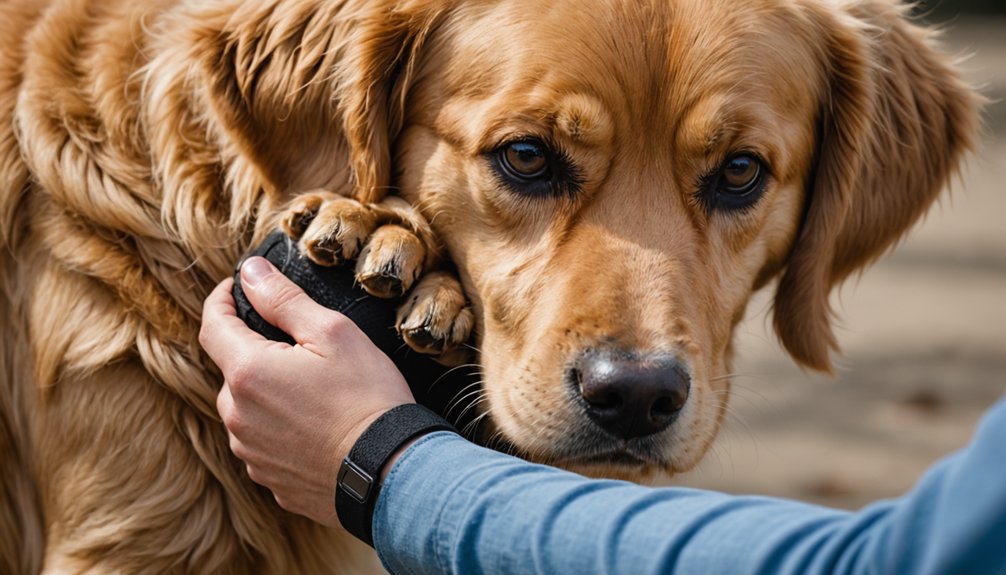
Confirming a proper fit takes a few deliberate checks, not just a glance. Start by seating the bootie so paw pads reach the front without crushing toes or nails, then confirm the sole lies flat with no sagging or bulging. Check that the dewclaw stays covered and the ankle area sits smooth, free of gaps or rolling edges. Good boot design keeps material even, not twisted or bunched, around the paw.
Test stability next: walk your dog, watch for slipping, spinning, or piston-like movement up the leg. Pinch the toe box and heel gently to confirm minimal internal shift. For the most accurate results, always perform these stability checks while your dog is standing rather than sitting. Finally, check paw health signs—no redness, swelling, or pinching after wear. These checks together confirm the fit is secure, comfortable, and safe for movement.
How Tight Should Straps and Closures Be?
Getting strap tension right comes down to one simple test: you should be able to slide a fingertip under the strap without much effort. Snug means secure, not restrictive—your dog’s toes need room to splay naturally, and the leg area should feel firm without cutting off circulation.
Closure placement matters just as much as tension: keep the strap around the leg or ankle, positioned under or over the dewclaw, never directly on top of it. This prevents pinching and reduces rotation, a major cause of rubbing. Long nails can also cause boots to shift and twist with every step, so trimming them beforehand helps closures stay properly positioned.
For short, active outings, tighter strap adjustment can curb slippage. On longer walks, ease up slightly to avoid pressure buildup from swelling. If fastening feels like a struggle, you’ve gone too tight—back off and reassess. Since dogs’ paws need time to breathe, avoid leaving booties fastened for extended periods regardless of how well they fit.
Common Sizing Mistakes That Cause Rubbing and Slippage
Because most fit problems trace back to how you measured in the first place, it pays to check your technique before blaming the boot. Sizing issues rarely come from poor materials—they come from bad measurements.
Measuring while your dog sits shrinks the paw, since standing weight spreads it wider. Always measure on a firm surface with full weight on the foot.
Don’t measure one paw and call it done.
Front and rear paws differ, so check all four and size for the largest. Skip breed-based guessing too; paw shape varies dog to dog, and only actual measurements matter.
Don’t ignore length—include toenails, since a boot that’s wide enough but too short causes rubbing. Measuring paw width is the most important measurement for comfort and stability, so never skip it when sizing.
Finally, check the specific brand’s chart, since sizes aren’t universal across companies.
Signs Your Dog’s Booties Are Rubbing or Chafing
A properly fitted boot shouldn’t leave a mark, so any visible change to skin or fur after removal deserves attention. You know your dog best, and catching early warning signs keeps them free to move without pain.
Check these areas every time you pull booties off:
- Skin and fur: Redness, flattened fur lines, or thinning patches at contact points.
- Behavior: Paw lifting, shaking, licking, or reluctance to walk once boots go on.
- Post-removal marks: Pressure lines, dampness, or odor where boot material sat against skin.
- Progression: Mild pinkness escalating to raw, warm, or swollen patches over repeated use.
Chafing prevention starts with knowing your dog’s normal skin and fur, then choosing bootie materials that breathe and flex with movement instead of trapping friction.
The Break-In Schedule That Prevents Paw Irritation
Since paw skin needs time to toughen against new pressure points, rushing straight into full-length walks sets your dog up for blisters and hot spots. Real paw protection comes from a structured boot acclimation process, not guesswork. Start with single-boot sessions indoors, then build toward full sets and longer outdoor walks as your dog’s gait stays relaxed.
| Day | Session Length | Focus |
|---|---|---|
| 1–2 | 5–10 min | Indoor, one-two boots, check for rotation |
| 3–4 | 10–15 min | All four boots, familiar terrain |
| 5–6 | 15–20 min | Outdoor walks, monitor skin/moisture |
| 6–7 | 20–30 min | Mixed surfaces, stable gait confirmed |
Check paws every 10–15 minutes, remove boots between sessions, and let skin fully recover before your next outing.
Materials and Design Features That Reduce Friction
Even a perfect break-in schedule won’t save your dog’s paws if the boots themselves generate friction with every step.
Boot materials matter as much as timing.
The right combination gives your dog freedom to move without hot spots or rubbing:
- Outer shell: Cordura or ballistic nylon resists abrasion, while reinforced toe caps stop fabric from collapsing onto nails and joints.
- Inner lining: Soft, open-cell padding and elastic fabrics conform to paw shape, cutting micro-movement that causes chafing.
- Moisture control: Breathable mesh and wicking fabrics keep pads dry, preventing the stickiness that amplifies rubbing.
- Sole design: Rubber or Vibram outsoles balance grip and flex, reducing internal shifting.
Choose boots built for friction reduction, and your dog moves confidently, unrestricted by irritation.
Choosing the Right Boot Height for Joint Comfort
Boot height affects far more than coverage—it directly influences how your dog’s joints move with each step.
Start by measuring paw width and length while your dog stands on a firm surface—weight-bearing measurements prevent boots that are too tight or prone to slipping.
Front paws typically serve as the sizing reference point.
From there, factor in body proportions.
Systems like Walkee Paws pair paw width with shoulder height, matching taller dogs to taller boots and shorter dogs to shorter ones.
This alignment keeps the boot opening near the ankle, supporting joint comfort without restricting motion.
Boot height that’s mismatched—too tall or too short—can alter stride and increase rubbing.
Test fit indoors first, watching for twisting, gapping, or unnatural movement before committing to longer wear.
Troubleshooting a Bootie That Still Won’t Stay Put
Getting the height right doesn’t guarantee a secure fit—plenty of dogs still twist, lose, or slide out of boots that seemed correctly sized on paper.
When boot issues persist, read the symptoms before reaching for slipping solutions:
- Rotation while walking points to width problems or a strap sitting below the paw’s widest point.
- Toe curling or high-stepping signals a toe box too short for natural splay.
- Heel lift means the boot’s too large—the paw isn’t reaching the front.
- Dewclaw pressure flags poor positioning or shape mismatch.
Fix the root cause: reposition the main strap above the carpal pad, center closures, tuck loose fur, and recheck fasteners after your dog’s first few steps under real weight.
Frequently Asked Questions
How Often Should I Re-Measure My Dog’s Paws as They Age?
Re-measure every 2-3 months during puppy paw growth, then every 3-4 months until 12 months. Once you’re an adult, check yearly or after age factors like weight change, arthritis, or activity shifts affect fit.
Can Booties Be Worn Safely in Hot Weather for Extended Periods?
No—you shouldn’t rely on booties for extended heat protection. For summer safety, keep outings short, test pavement first, choose breathable soles, walk early or late, and remove booties often so paws can cool and dry freely.
Do Booties Need to Be Replaced After a Certain Number of Uses?
No, you don’t replace booties by a fixed count. Bootie replacement depends on condition—bald soles, tears, or failing closures—not usage tallies. Judge bootie longevity yourself through inspection, and you’ll decide when it’s time.
Should I Size up if My Dog Is Still Growing?
No—size for current paws, not puppy growth or breed standards. Measure every few months instead. If you’re exactly between sizes, choose the larger one for slight room, but skip oversizing otherwise; snug fit prevents slipping and rubbing.
How Do I Clean and Dry Booties Between Wears Without Damaging Fit?
Hand wash booties in cold water with mild soap, skip bleach, and press out excess water. Air dry away from heat, stuffing them lightly. Good bootie maintenance and consistent cleaning techniques keep fit intact—no rubbing, no surprises.
Conclusion
You’ve got everything you need to get this right. Measure both paws, check the size chart carefully, and don’t skip the break-in schedule. Watch for rubbing, check strap tightness daily, and adjust boot height for your dog’s joints. If a bootie still won’t stay put, troubleshoot the fit before giving up on it. Do this correctly, and you’ll prevent irritation while keeping your dog’s paws protected and comfortable.
References
- https://www.caninestyles.com/blogs/news/dog-booties-guide-dog-boot-size-chart
- https://dogbooties.com/sizing-info/
- https://walkeepaws.com/blogs/news/dog-boot-sizing-guide
- https://www.youtube.com/watch?v=OWmPyS6l2jQ
- https://www.youtube.com/watch?v=KWQ83CKI9uw
- https://www.chewy.com/education/dog/general/dog-shoes-boots
- https://www.mountaindog.uk/blogs/journal/measuring-sizing-dog-shoes-booties-socks
- https://www.youtube.com/watch?v=roKjimsR2kY
- https://help.cabelas.com/orders-products-9c839d02/how-do-i-measure-my-dogs-foot-for-dog-boots-8377494e
- https://www.sierra.com/blog/all/how-to-size-dog-boots-so-they-dont-come-off/