Protect your dog’s paws by fitting them with durable, well-traction boots like the Ruffwear Grip Trex, and toughen pads gradually with terrain conditioning before you hit talus fields. Trim nails regularly, apply paw wax for extra cushioning, and check paws often for cuts or embedded debris. Plan routes ahead using maps and satellite imagery to avoid the worst rockslides. There’s more to know before you head out on that scree slope.
TLDR Key Takeaways
- Fit dogs with durable, well-traction boots like Ruffwear Grip Trex to shield paws from sharp rock edges.
- Train paws beforehand using cavaletti poles, wobble boards, and varied terrain to build confidence and control.
- Apply veterinary-formulated paw wax or balm to protect pads from cuts and cracking on jagged scree.
- Keep nails trimmed and filed every 3-4 weeks to prevent torn nails or twisted toes on unstable rock.
- Test rock temperature and reroute toward shaded, vegetated paths to avoid heat-related paw injuries.
Why Scree and Talus Are Dangerous for Dog Paws
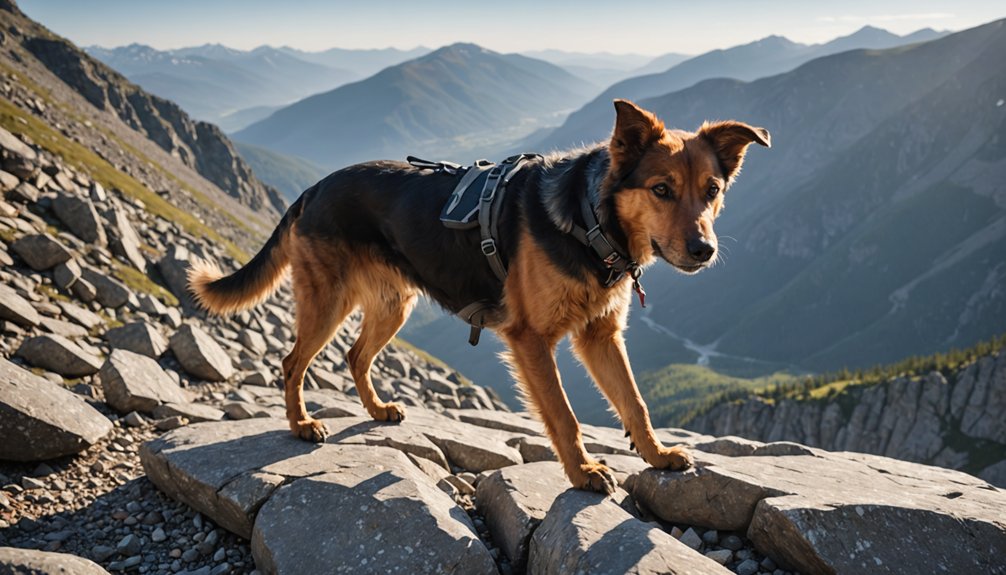
Because scree and talus fields consist of jagged, unstable rock fragments, they pose a serious threat to your dog’s paws with every step. These rock hazards cut, puncture, and grind against pads with every stride your dog takes. Sharp edges slice through skin, while shifting stones create shearing forces that tear and abrade tender tissue.
You’ll find loose rock underfoot invites slips, sprains, and even fractures in toes and joints. Blunt impacts from rolling stones bruise soft tissue beneath the surface. Left unchecked, these paw injuries evolve into pododermatitis, infections, or thick calluses that crack and ulcerate. Foreign debris wedges between toes, sparking inflammation and persistent pain. Much like rough concrete, jagged rock surfaces can cause abrasions or cuts on a dog’s paws with repeated contact. A sprain sustained on treacherous terrain can be classified into three levels of severity, ranging from mild to severe. Every rocky slope demands respect—your dog’s freedom to investigate depends on you recognizing these dangers before they strike.
Assess the Route Before You Head Out
Knowing these dangers exist doesn’t help your dog unless you plan around them before setting foot on the trail.
Route planning starts with guidebooks, topo maps, and recent trip reports—look for sections flagged as scree or talus, and note their gradient and length.
Prioritize established trails over cross-country lines that force direct travel on loose rock.
Use satellite imagery to spot boulder fields and rockslides before you commit.
Terrain assessment matters just as much on the ground.
Distinguish solid bedrock from blocky talus and loose scree, since jagged rock tears pads fast.
Favor switchback approaches over straight climbs or descents, and skip wet or icy boulder-hopping entirely.
When loose rock stretches on for miles, cut your mileage and give your dog’s feet a fair chance.
Remember that established trails across scree are often just packed indentations worn down by countless previous hikers, and these tend to be gentler on paws than untouched rock.
Experienced mountaineers judge terrain difficulty partly by rock size, since larger talus fragments demand different footing and pacing than fine scree.
Also check whether the route includes any trail-side water, since access to it can make a real difference for a dog crossing rough ground.
Train Your Dog for Safe Paw Placement on Scree

Good footing on scree isn’t instinct—it’s a skill you build long before the trailhead. Paw training starts on stable ground, where cavaletti poles and targeting drills teach your dog controlled, deliberate steps. Short sessions keep focus sharp and prevent sloppy footfalls from creeping in.
From there, build terrain awareness through “place” work—guiding all four paws onto boards, then stones, then irregular surfaces that mimic talus. Reinforcing each successful placement with consistent commands helps your dog understand exactly what’s expected on unpredictable footing.
| Training Stage | Skill Built |
|---|---|
| Flat ground drills | Precise paw placement |
| Raised targets | Full-body alignment |
| Single-paw isolation | Weight-testing before commitment |
| Wobble boards | Calm movement on shifting ground |
Progress from large, stable rocks to smaller, mobile ones. This systematic approach builds confidence without sacrificing the careful, automatic footwork scree demands. Because paws are densely packed with mechanoreceptors and nociceptors, this gradual progression allows your dog’s natural sensory feedback to guide safer, more deliberate movement over sharp, unstable terrain.
Choose the Right Dog Boots for Rocky Terrain
Scree doesn’t forgive a bad boot. Choose gear built for terrain adaptation, not casual walks.
Your dog’s paws depend on boot materials that balance flexibility enhancement with rugged abrasion resistance, standing up to jagged granite and basalt without stiffening into a liability. Booties are especially useful on super rocky hikes where terrain can quickly damage unprotected paws.
Focus on three non-negotiables:
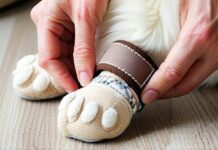
- Traction systems — deep, multi-directional lugs paired with sole durability that grips loose talus and resists puncture. Models like the Ruffwear Grip Trex have earned top marks for traction and durability on rugged rock.
- Protection features — reinforced toe protection, extended cuffs for ankle support, and tear-resistant uppers that shield against sharp edges.
- Fit and comfort — closure security that prevents twisting, plus breathability features and moisture management to keep paws dry and blister-free. Ruffwear boots are rated 4.6 out of 5 stars based on over a thousand reviews, reflecting strong owner confidence in secure, comfortable fit.
The right boot doesn’t restrict your dog’s freedom on rock—it earns it, mile after unforgiving mile.
Get the Fit Right: Sizing Boots and Socks
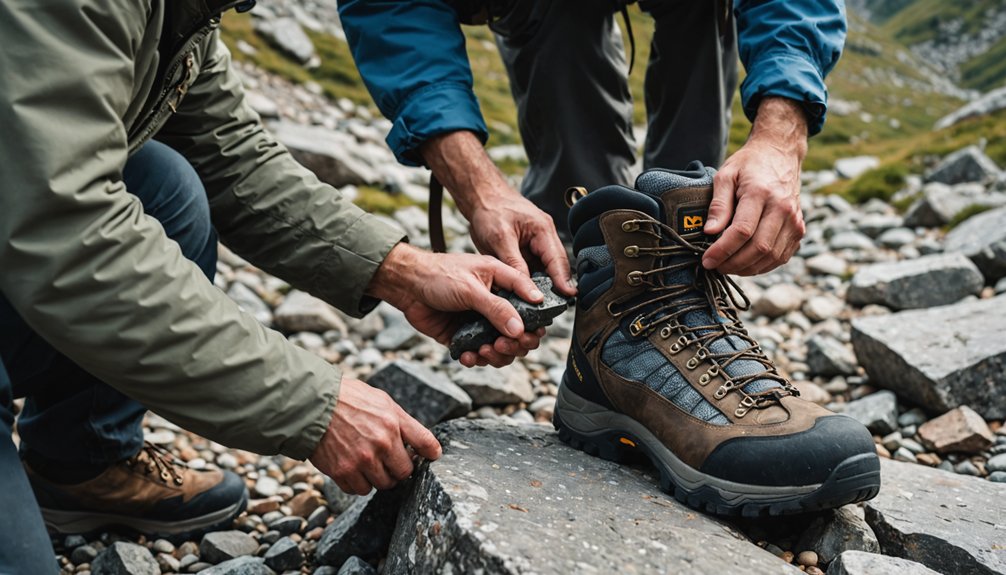
A sloppy measurement wrecks even the best boot on the market. Get paw measurement right by having your dog stand fully weighted on a firm, non-slip surface—paws spread differently under load than in the air. Trace both edges for width, then measure heel to toenail for length. Press gently to mimic walking spread.
Measure front and rear paws separately; fronts usually run larger, and mismatched sizing causes slipping or compression. Compare numbers directly to the brand’s chart, since breed guesses fail. If you’re stuck between sizes, choose snug width for control on loose scree. Once fitted, test indoors: dog boots should allow toe splay, stay secure through straps or Velcro, and never twist, sag, or kick off during a natural stride. It’s also wise to re-measure your dog’s paws every few months, since paw size can shift over time and affect the fit you originally chose. Keep in mind that paws are generally proportionate to dog’s size, though this isn’t always a reliable shortcut for choosing boot size. Since boot sizes vary by manufacturer and type, always confirm the correct size listed in the specific item description before ordering.
Use Paw Wax and Balms for Extra Protection
Wax and balm won’t replace a boot, but they’ll cover what boots can’t reach—edges, cracks, and exposed pad surface prone to cuts on sharp scree.
Paw maintenance on talus fields demands more than gear alone; it requires a barrier that flexes with your dog’s stride while resisting grit and abrasion. Choose veterinary-formulated products only—human creams over-soften skin and invite tears. Look for:
- Purified beeswax for a durable, flexible shield against angular rock.
- Shea butter or coconut oil to nourish tissue without sacrificing traction.
- Fragrance-free formulas that skip sensitizers and unknown additives.
Wash and dry pads before wax application, then coat the entire surface, including small cracks. Reapply pre-hike, and use hydrating balm post-hike to support recovery. If pads show cracking or thermal-style damage from rough terrain, cleaning the area with saline solution before applying any product helps prevent infection. Keeping the almohadillas soft and supple after long outings reduces the chance of cracking on future rocky terrain.
Keep Nails Trimmed to Protect Paws From Snags
Overgrown nails turn every rocky step into a gamble. A snagged claw on scree can mean torn nails, twisted toes, or a hike cut short. Nail trimming isn’t optional paw maintenance—it’s trail insurance.
Check your dog’s stance: if nails touch the ground or click on hard floors, they’re too long. Trim every 3-4 weeks, clipping only the tip and staying 2-3mm from the quick. For dark nails, take small 1-2mm clips and watch for the chalky center that signals you’re close. Follow up with filing or a grinder to round sharp edges, eliminating hooks that catch on jagged rock. Keep styptic powder on hand for accidental cuts. Consistent trimming keeps paws snag-free and ready for whatever terrain you choose to conquer.
Protect Pads From Hot Rock Surfaces
Trimmed nails won’t do your dog any good if the pads underneath are blistering on sun-baked rock.
Rock temperature can spike 15–25°C above air temperature, hot enough to blister pads in minutes—especially on dark basalt or surfaces near reflective water and metal.
You’re out there for freedom, not for a vet visit over avoidable burns.
Before you commit to any talus field, do your surface testing: press your palm to the rock for 5–10 seconds.
Can’t hold it there?
Neither can your dog’s pads.
- Test constantly — rock temperature shifts fast across elevation and sun exposure.
- Move early or late — skip peak heat hours entirely.
- Reroute on the fly — choose shaded or vegetated lines when rock runs hot.
Take Frequent Breaks to Check for Embedded Debris
Constantly grinding against scree and talus, your dog’s paws pick up more than just wear—they collect gravel, splinters, and thorns that work their way between pads and toes with every step.
Stop every 20–30 minutes on continuous scree, or whenever terrain shifts to sharper rock, for a thorough paw inspection. Check before and after steep descents, when front paws bear the most weight. Flip each paw, spread the toes, and press gently on the metacarpal pad to expose hidden debris. Scan tops, sides, and webbing—not just pad surfaces. Use a magnifying glass if needed to spot fine splinters. Prompt debris removal prevents punctures, cysts, and pressure sores from developing. These quick breaks protect your dog’s freedom to keep exploring rugged trails safely.
Spot Signs of Paw Injury on the Trail
Even with regular debris checks, injuries can develop between stops, so you’ll need to watch your dog’s movement and behavior throughout the hike.
Scree and talus fields create constant trail hazards, and paw injuries can surface fast. Your dog’s behavior tells the story before you spot any wound, so trust what you see and act quickly.
- Gait shifts – Limping, shortened stride, or refusing to bear weight signals pain from cuts, punctures, or fractures needing prompt attention.
- Paw fixation – Licking, chewing, or favoring one paw points to trauma, embedded debris, or irritation between toes.
- Visible damage – Redness, swelling, bleeding, or discoloration demands immediate canine first aid to prevent worsening injury on the trail.
Treat Cuts, Abrasions, and Overheated Pads on the Spot
Grit, glass, and scree fragments work their way into cuts fast, so flush the paw immediately with cool or room-temperature water. Swish it in a bowl, stream, or squeeze bottle to dislodge debris, then clean with mild soap or diluted chlorhexidine—skip peroxide and alcohol, which damage tissue and slow healing. Check pads and between toes; don’t dig for deeply embedded objects. Pat dry before bandaging.
For paw injuries with bleeding, press firm gauze against the wound for 5–10 minutes. Cool overheated or burned pads with running water for five minutes, avoiding ice.
Effective wound cleaning matters most here—cover with non-stick gauze, wrap snugly, and keep moving only if bleeding stops and your dog bears weight comfortably.
Build Long-Term Paw Resilience for Future Hikes
Once you’ve patched up an injury, shift your focus to preventing the next one.
Real toughness comes from paw conditioning, not luck.
Build it deliberately, and future scree fields won’t stand a chance.
1. Progress the terrain: Move from grass to dirt, then gravel, then rock.
Small increments thicken the stratum corneum without tearing it.
2. Manage terrain exposure: Save drainage stones, shale, and lava rock for last—only after pads show thickening and zero tenderness post-walk.
3. Rest and recover: Break every 60–120 minutes on longer treks so micro-damage repairs before it compounds.
Pair this with nail trims, hydration, and paw balm.
Freedom on rough trails is earned through preparation, not shortcuts.
Frequently Asked Questions
How Much Do Quality Trekking Boots for Dogs Typically Cost?
You’ll pay $30–$80 for a quality four-boot set, with boot prices clustering around $45–$65. Premium technical models hit $50–$80. Don’t skimp—your hiking costs reflect real durability on sharp scree and talus.
Can I Make DIY Paw Wax at Home Instead of Buying It?
Yes, you can craft your own paw protection using natural remedies. Melt beeswax, coconut oil, and shea butter together, then cool. You control every ingredient—no hidden chemicals, no dependency on stores. Total freedom, total protection.
What Breeds Are Naturally More Resistant to Rough Terrain Injuries?
You’ll find rugged breeds like Great Pyrenees, Alaskan Malamutes, and Australian Cattle Dogs naturally resist rocky terrain injuries. Their tough paw pads, sturdy limbs, and hardy build let you roam scree fields confidently, without constant worry over cuts or strains.
How Long Before a Hike Should I Apply Paw Wax?
Apply wax 10-15 minutes before hitting the trail, letting it absorb fully. For serious paw protection methods against scree field hazards, you’ll want two weeks of daily conditioning beforehand—don’t wing it on demanding terrain.
Is Pet Insurance Worth It for Frequent Scree Hiking Trips?
Yes, it’s worth it. You’ll gain real insurance benefits when scree tears a pad or cracks a toe. Check policy coverage for accident trauma before you commit—then hit the trail without hesitation, fully protected, fully free.
Conclusion
Scree and talus don’t forgive careless prep. You’ve got the tools now: assess the route, condition your dog’s paws, fit boots correctly, and stop often to check for damage. Don’t wait for a limp to tell you something’s wrong—inspect before you’re forced to. Treat small injuries immediately, and keep building paw resilience between hikes. Do this consistently, and you’ll turn brutal rock fields into terrain your dog handles with confidence.
References
- https://clinicaveterinariasomo.vet/proteger-almohadillas-perros-verano/
- https://www.tiendanimal.es/perros/higiene-para-perros/productos-para-el-cuidado-de-almohadillas-de-los-perros/
- https://www.youtube.com/watch?v=TiMpuYZbLYU
- https://www.youtube.com/watch?v=MvOQHJaY7fU&vl=en-US
- https://www.woofz.com/es/blog/como-proteger-las-almohadillas-de-los-perros-en-verano/
- https://www.hospitalveterinarioasturias.com/2025/06/19/cuidados-de-las-patas-de-tu-mascota-en-terrenos-dificiles-asfalto-caliente-nieve-o-barro/
- https://www.redcanina.es/botas-para-perros/
- https://montecastrovelabradores.es/informacion/protector-patas-perro/
- https://www.instagram.com/reel/C3xk5wXuok8/
- https://www.youtube.com/watch?v=wE8XAV3xNr0